- [email protected]
- Call us: +86 18162023029
No matter if you are a daily or extended hair wearer, eventually the adhesive residues will begin to build up on your system and get into the hair. To help protect your hair replacement system, regular clean up is recommended.
Tips & Instructions for Proper Hair System Clean-up
Below are instructions for removal of adhesive build up on both polyurethane (skin) as well as mesh-fabric (lace) bases. This process will also get adhesive residue out of the hair.
ATTENTION! Do not use this process if your system is made from silicone!
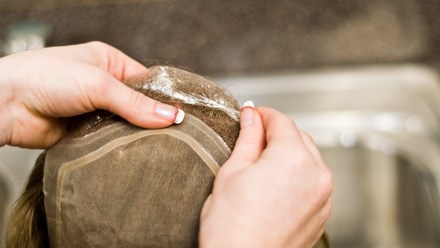
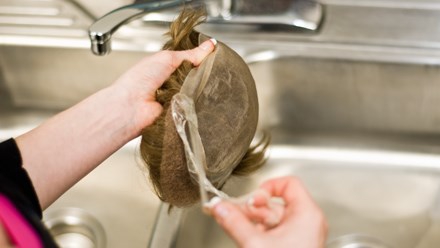
Start by removing the hairpiece tape from the polyurethane areas of your system.
Use your fingernail to gently "flick" or scrape up the very edge of the hairpiece tape to start the peeling.
Warning: Do not attempt to peel away or remove any tape from lace areas otherwise you could damage the unit.
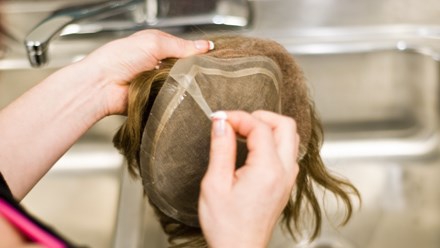
Quick Tip: Having problems getting the tape off? Try soaking your hair system in the adhesive remover first (step 2) for several hours before peeling it off. If you do soak it first, use a piece of toilet paper to get a better grip on the tape because it may be slippery.
Next, hop into the shower and wash your entire head, hair and scalp thoroughly at least two times.
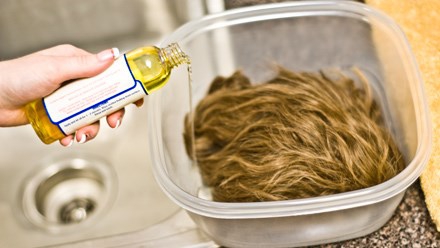
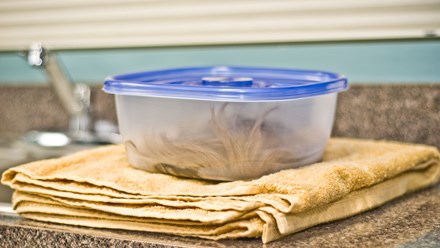
Soak the hair system in a plastic or stainless steel container capable of holding liquid solvent.
Soaking times may vary greatly depending on the type of hair system and adhesive you're using. Some will only need their unit to soak for 20 minutes while others may need to keep it in the solvent for up to 24 hours!
Quick Tip: If you have tape on the lace areas of your system, they should naturally release after about 5-30 minutes of soaking and float to the top of the solvent. (Again, you may need to adjust the soak time if using a higher tack tape) Simply scrap the strips of tape from the container as they're released.
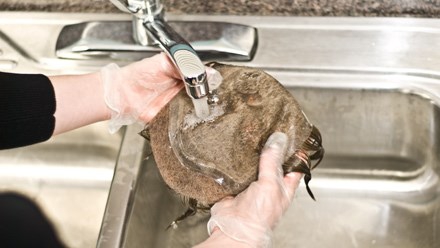
Remove your hair system from the solution and lay it in a sink face up (the hair will be on the bottom).
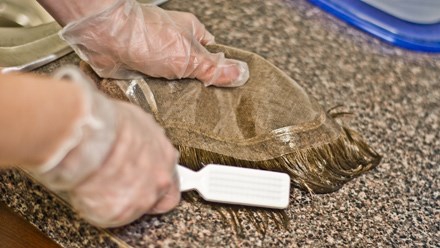
To clean the lace areas gently brush the swollen adhesive residue with a finger nail brush to loosen and break it free.
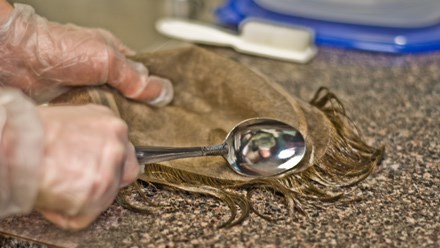
To clean the skin areas use a teaspoon by scraping any excess residue off with gentle, short vertical strokes.
After getting most of the excess residue off, place your unit back into the container full of solvent for 2-3 more minutes.
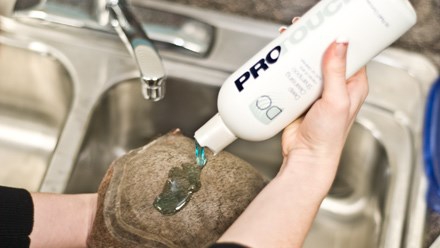
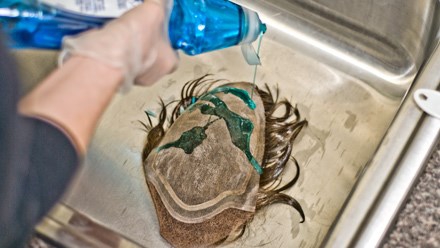
Moving your system from the solvent back into the sink, squirt a liberal amount of hand dish washing liquid onto the base while it is still dripping wet with solvent. At this point, any remaining adhesive residue will have lost all tack.
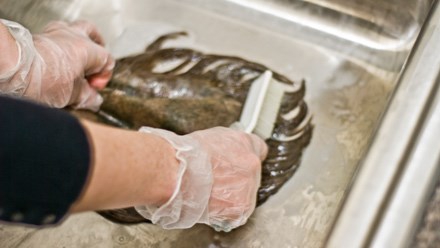
Gently glide the fingernail brush across the edge of the base and out through the hair — all the remaining adhesive residue should slide off easily. After a few minutes of brushing, rinse your system with high pressure lukewarm water down through the base. (Repeat this step a second time)
If there is still adhesive residue in your hair system, you probably didn't soak it in the solvent long enough. Go back and repeat step 2.
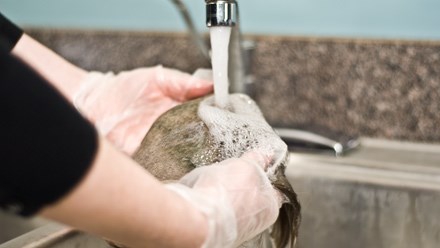
Finally, after rinsing thoroughly wash the unit again, this time using a mild shampoo to balance the acid level and lastly condition.
Your unit should now be clean and clear of any old adhesive residue. You're now ready to reattach and begin wearing the fresh (like new) system!